
How to Configure Shared Content Between Sites
My goal was to make using the plugin as simple and intuitive as possible. But anyway, let me guide you through the installation process step by step.
1. Activate the plugin for Multisite Network
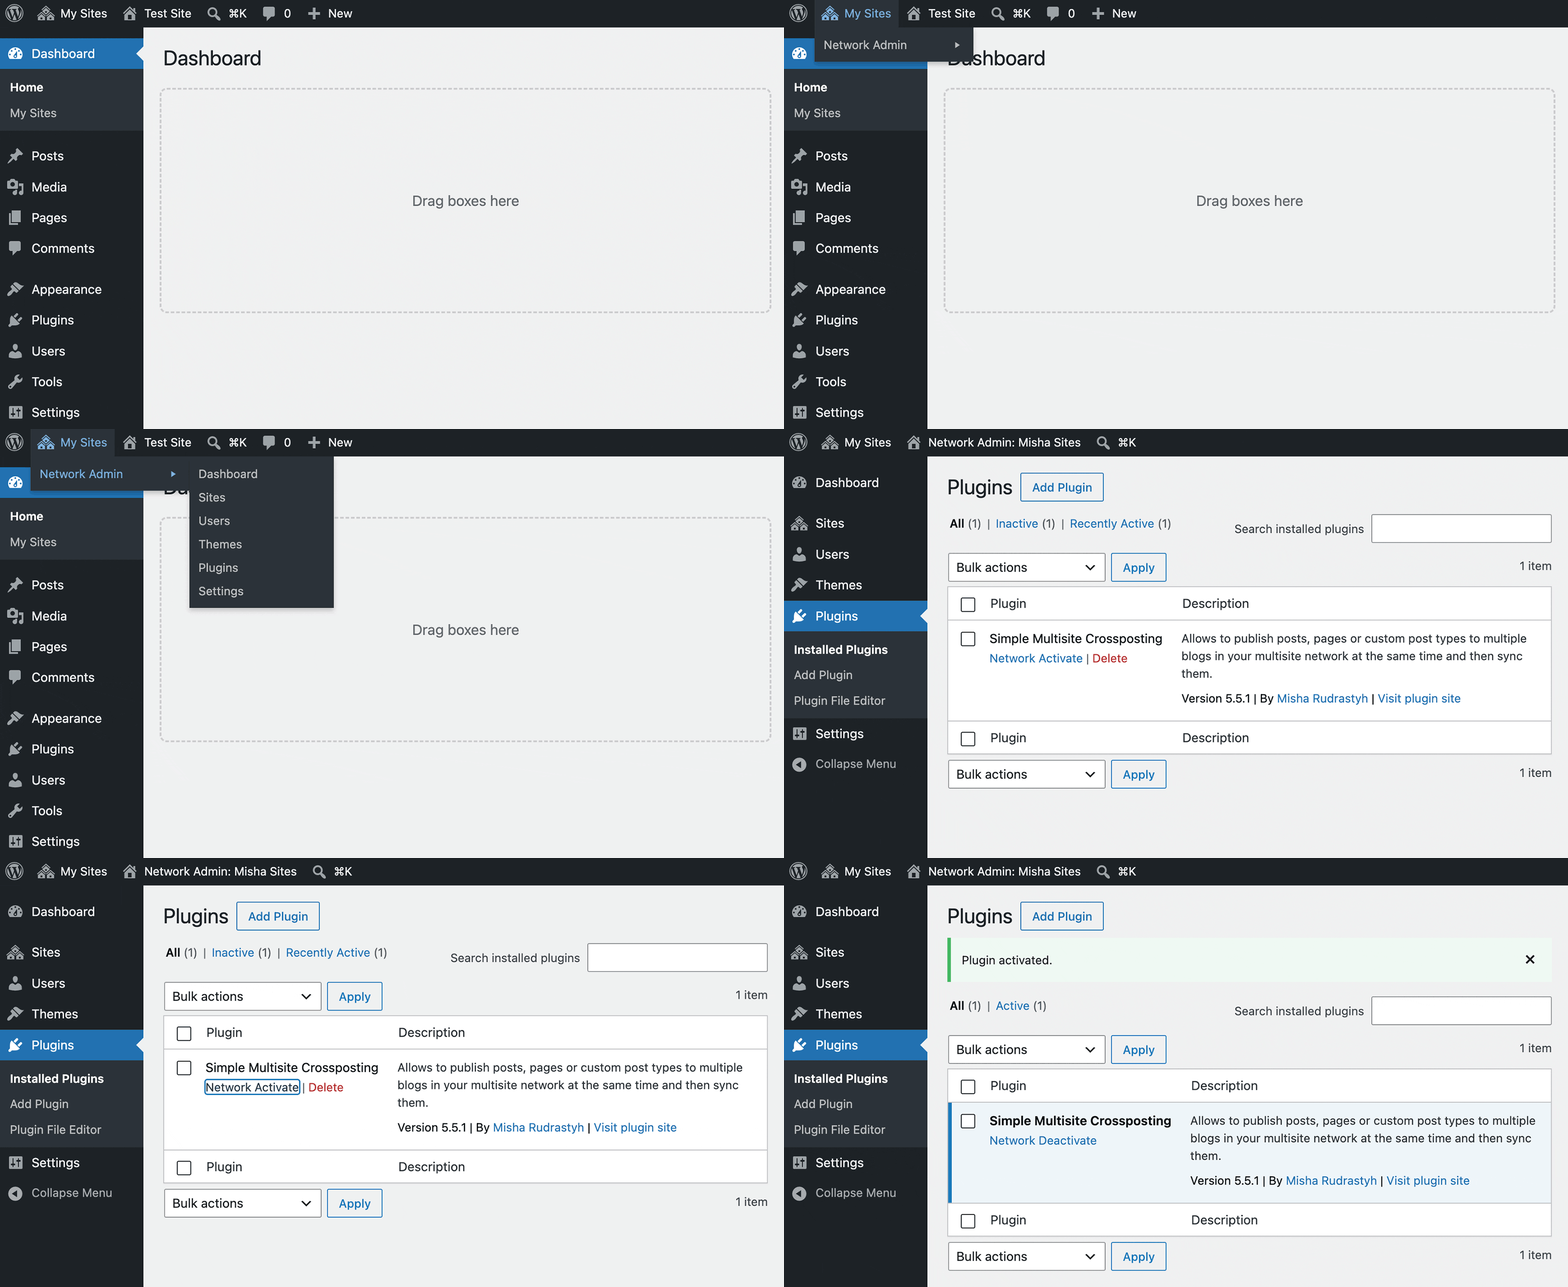
Once you add the plugin to your website, you need to “Network activate” it. In order to do so, please go to My Sites > Network Admin > Plugins and click the “Network activate” link.
2. Configure the plugin
The plugin has a bunch of settings in Settings > Network Crosspost.

The cool thing here also is that you can switch to the “Fields” tab and configure exactly what you would like to crosspost. For example, you can ignore post statuses, so the posts are going to be created as drafts, and when you’re about to update them, their statuses on subsites remain unchanged.

3. Configure what sites to allow for cross-posting
By default, after the initial plugin installation, the plugin will allow the first 5 sub-sites from your WordPress multisite network, ordered by their IDs. Because when you have hundreds of sub-sites in your network, it is probably better to manually choose which ones should be allowed for crossposting.
To do so, please go to Network Admin > Sites, then select a website you would like to configure, click the “Edit” link first, and then select the “Crosspost” tab.

4. Select the sub-sites when creating a post
In case you’re using the Gutenberg editor:

In case you’re using the Classic Editor:
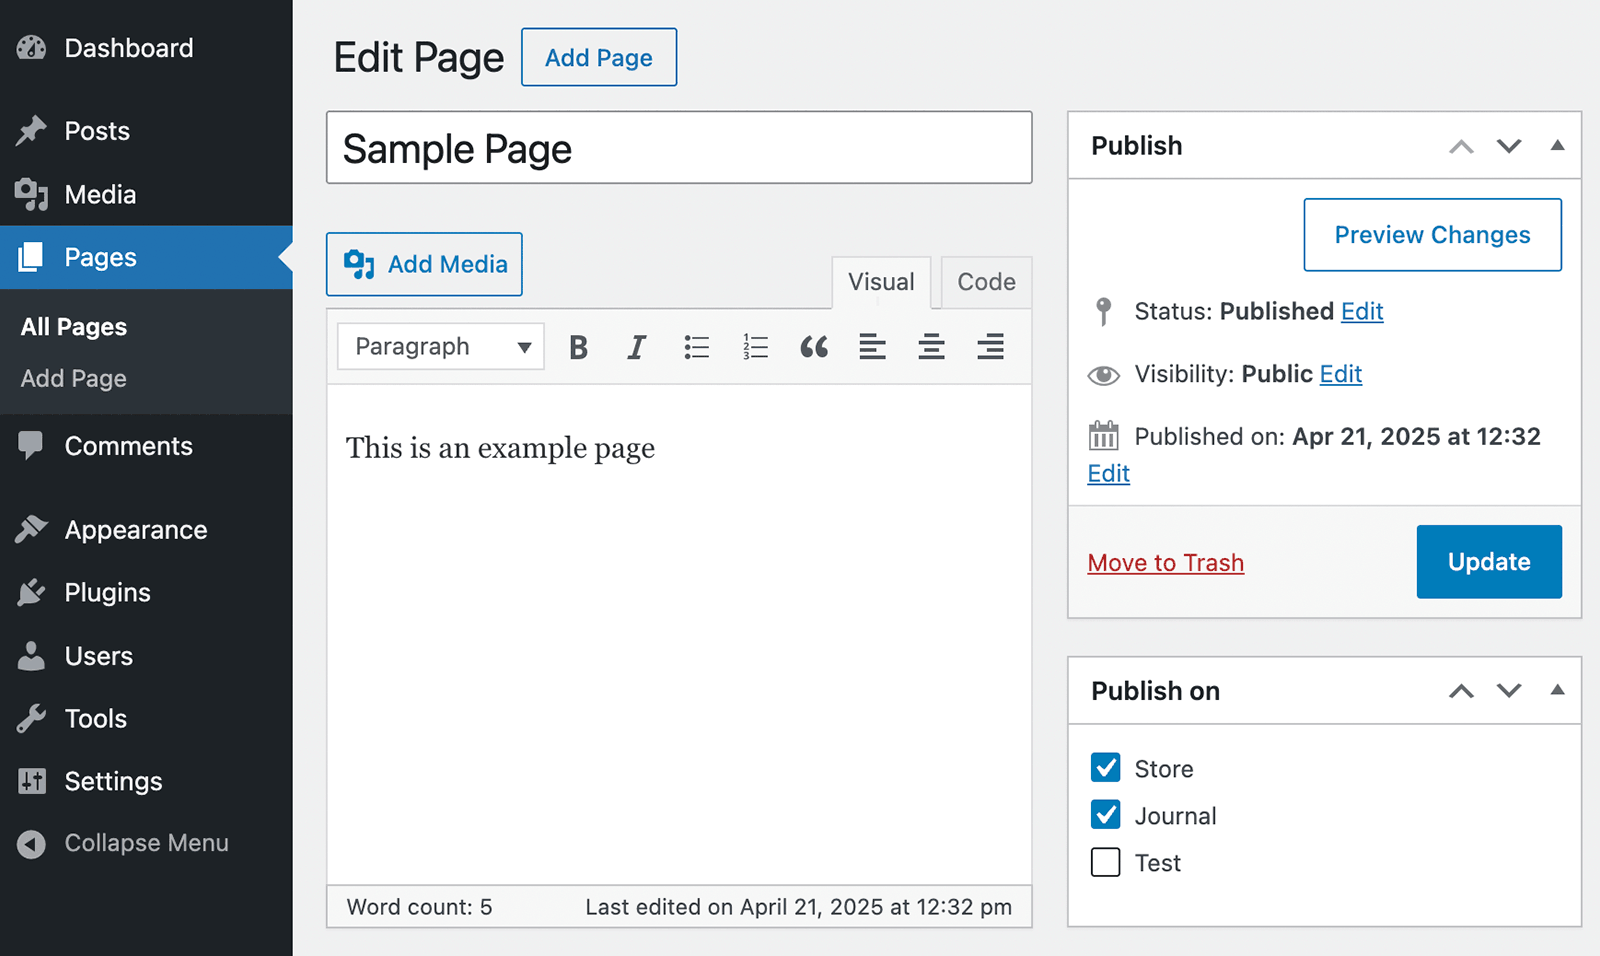
Once you publish a post on multiple websites in your network, you can deactivate the checkboxes. If you don’t, your posts will continue to sync. In other words, posts can be independently edited on each website.
This is how it will work:
Bulk Crossposting
The plugin also has a feature to crosspost multiple posts at the same time without going into each post.
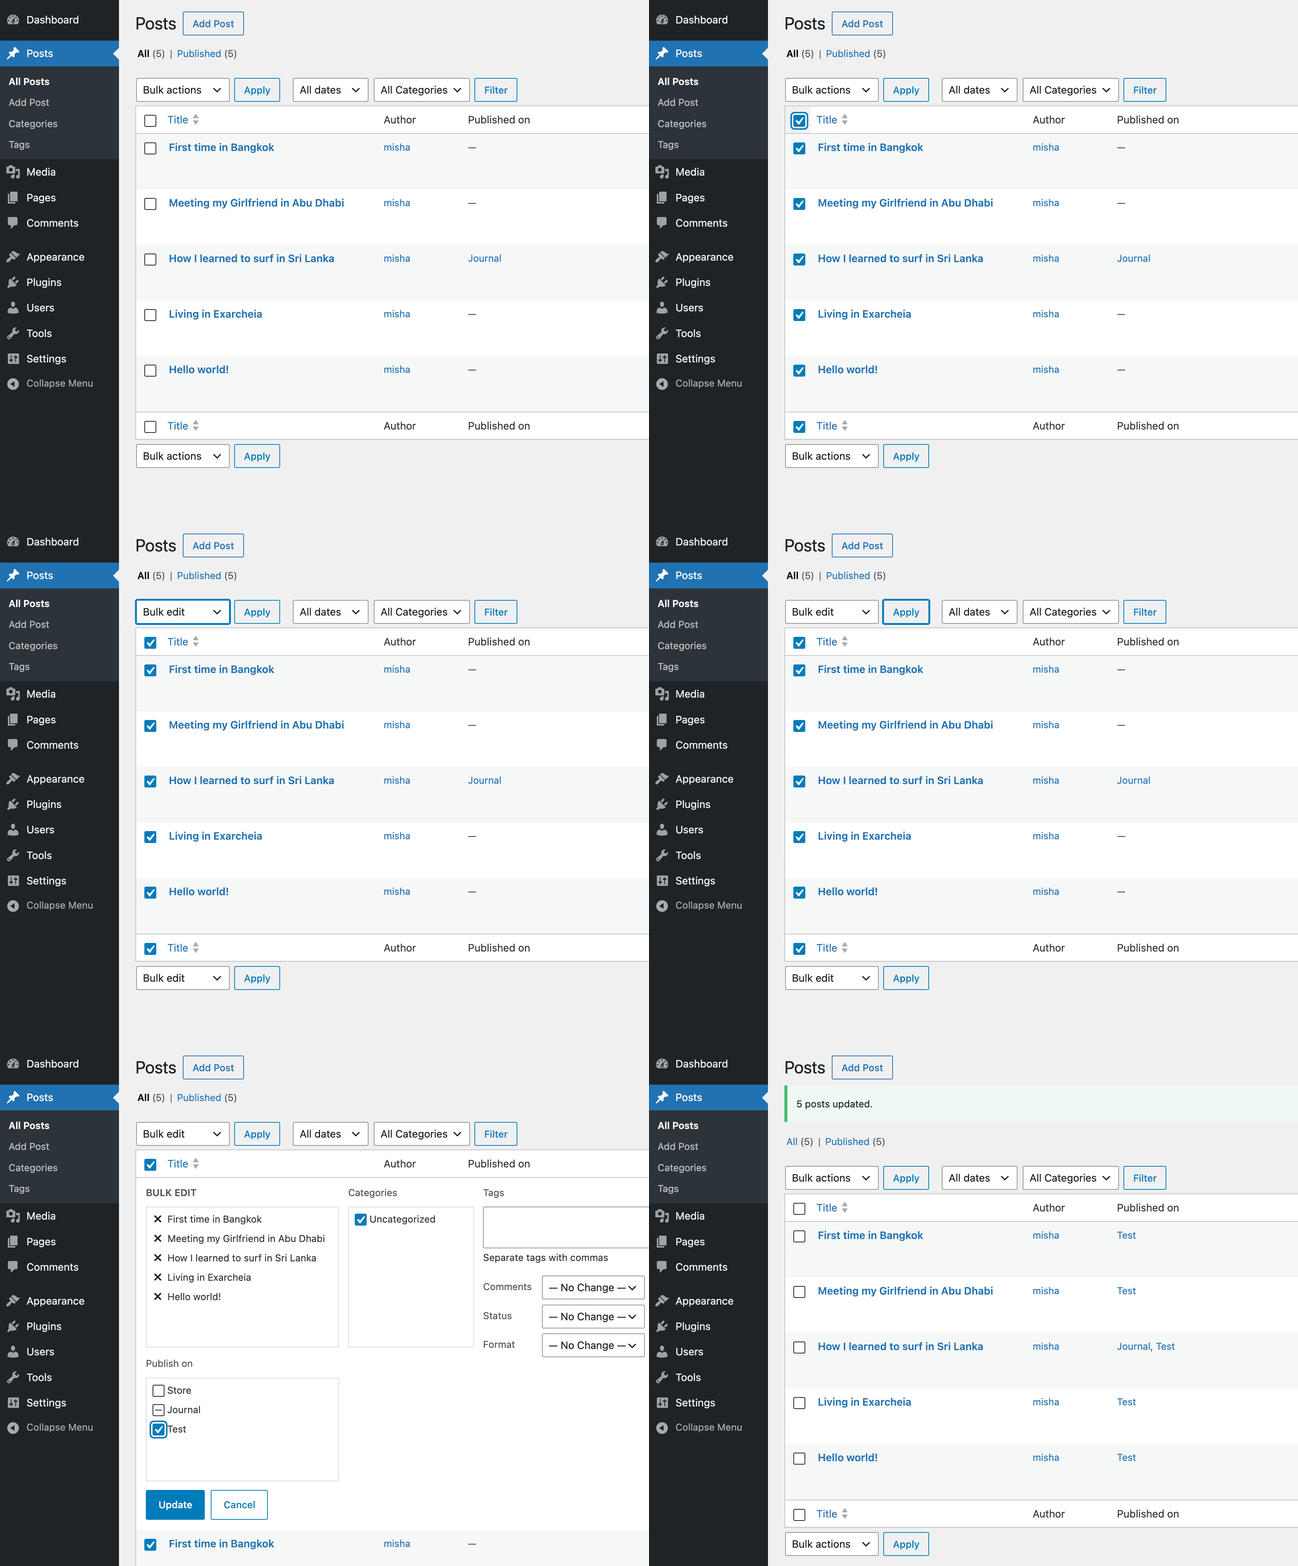
Sometimes, even using bulk actions may not be so convenient when you have a really large number of posts on your subsites, like tens of thousands or something. In that case, I’d recommend using a WP-CLI command that is available in the plugin as well.
Product Sync in WooCommerce
The plugin also allows you to sync WooCommerce products between stores within a single multisite network. The product connection can be established either by a custom field, SKU (by default), or by the “GTIN, UPC, EAN, or ISBN” field (can be configured in the settings).
Supported types of products:
- Simple,
- Grouped,
- External/Affiliate,
- Variable (together with product variations),
- Bundle products (in case you’re using the “Woo Product Bundles” plugin),
- and, of course, virtual and downloadable products.
Check an example in the video below:
You can also exclude specific WooCommerce product data from syncing, such as prices, stock quantities, or product images and galleries.